How to embed a guidebook preview on your website
Show a preview of your guide on your website to give guests a sneak peek and encourage bookings.

In this article
- What this feature does
- Step 1: Choose what to show in your preview
- Step 2: Create your guide link
- Step 3: Add an iFrame to your website
- Step 4: Embed your guide preview
- Notes
What this feature does
You can embed a preview of your guide on your website to showcase your content to potential guests.
This is a great way to:
- Give guests a sneak peek of your guide
- Highlight useful information
- Encourage bookings
- Avoid recreating content on your website
Step 1: Choose what to show in your preview
First, decide which parts of your guide you want to display.
To do this, you can lock or unlock Categories, Subcategories, or Topics.
- Unlock the content you want to show
- Keep the rest locked
For example, you may want to keep sensitive information (like door lock codes) hidden.
How to lock or unlock content
Option 1 Categories or Subcategories
Use this if you want to lock or limit an entire Category or Subcategory:
- Click the three dots next to the title
- Change the access level

Optio 2 Topics:
Use this if you only want to lock or limit a specific topic:
- Click the lock icon next to the topic
- Black lock = locked
- Transparent lock = visible

Step 2: Create your guide link
There are two ways to generate your guide link, depending on what you want to show.
Option 1: Show your full guide
Use the Quick Share link if:
- You don’t have any locked sections
- You want to display your full guide
Steps:
- Go to the Guides page
- Find your guide and click the three dots next to the guide name
- Click Copy Share Link
💡 Tip: This link will show your full guide, so make sure everything you want to display is visible.

Option 2: Show a limited preview (recommended)
Use an Invitation link if:
- You want to keep some content private
- You only want to show part of your guide
Steps:
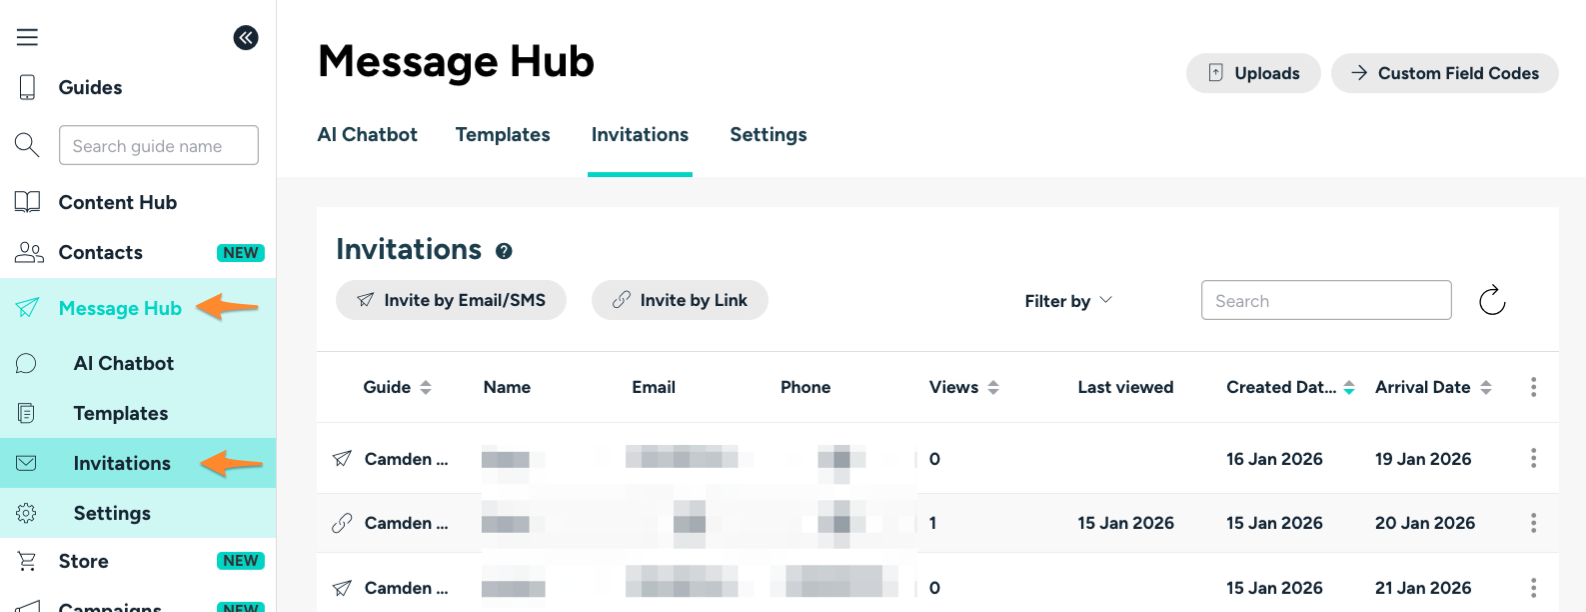
- Go to the Message Hub page
- Click the Invitations tab
-
Click Invite by Link
- Select your guide
- Add a name in the First Name and Surname field
- 💡 Tip: Use something like “Website Preview” so you can easily recognise this link later
- Set an Arrival date and Departure date far in the future
- Set Lead Time to No
- Click Submit
- Copy the link provided

This creates a unique guide link that you can use for your website preview.

Step 3: Add an iFrame to your website
To display your guide, you’ll need to add an iFrame to your website.
How you do this depends on your website provider.
For example, in WordPress, you can install an iFrame plugin
💡 Tip: If you're unsure how to do this, your website provider or developer can help.
Step 4: Embed your guide preview
Once your iFrame is set up:
Paste your Quick Share link or Invitation link into the iFrame
Example: [iframe width=“100%” height=“600” src=“paste-the-Quick Share- link-here”]
Important: You may need to adjust this depending on your website platform. Reach out to your website provider for instructions on how to do this.
And that's it! Below is an example of what the embedded guidebook preview looks like on the website of our friends at Sea View Cottage

Notes
- Not all web browsers support iFrames, so some visitors may not see the preview
- If you change which sections are locked or unlocked, your preview will update automatically
- If you want a different version of your guide for your website (compared to guests), you may need to create a second guide
Need Assistance?
If you have questions or need further help, we are ready to assist. Please reach out via help widget located in the bottom left corner of your screen, or directly via support@touchstay.com