Hosthub Integration
Connect your Touch Stay and Hosthub accounts to import Hosthub rental & booking data into your guides and make it easier to share guides with your guests.

The steps to complete your integration:
- Step 1: Connect your Touch Stay & Hosthub accounts
- Step 2: Match Hosthub Rentals
- Step 3: Import Hosthub rentals
- Step 4: Complete guide creation (new Touch Stay customers only)
- Step 5: Personalisation settings
- Step 6. Sync Bookings
- Step 7. Sharing guide links through Hosthub
- A note about Hosthub message timing
Step 1. Connect your accounts
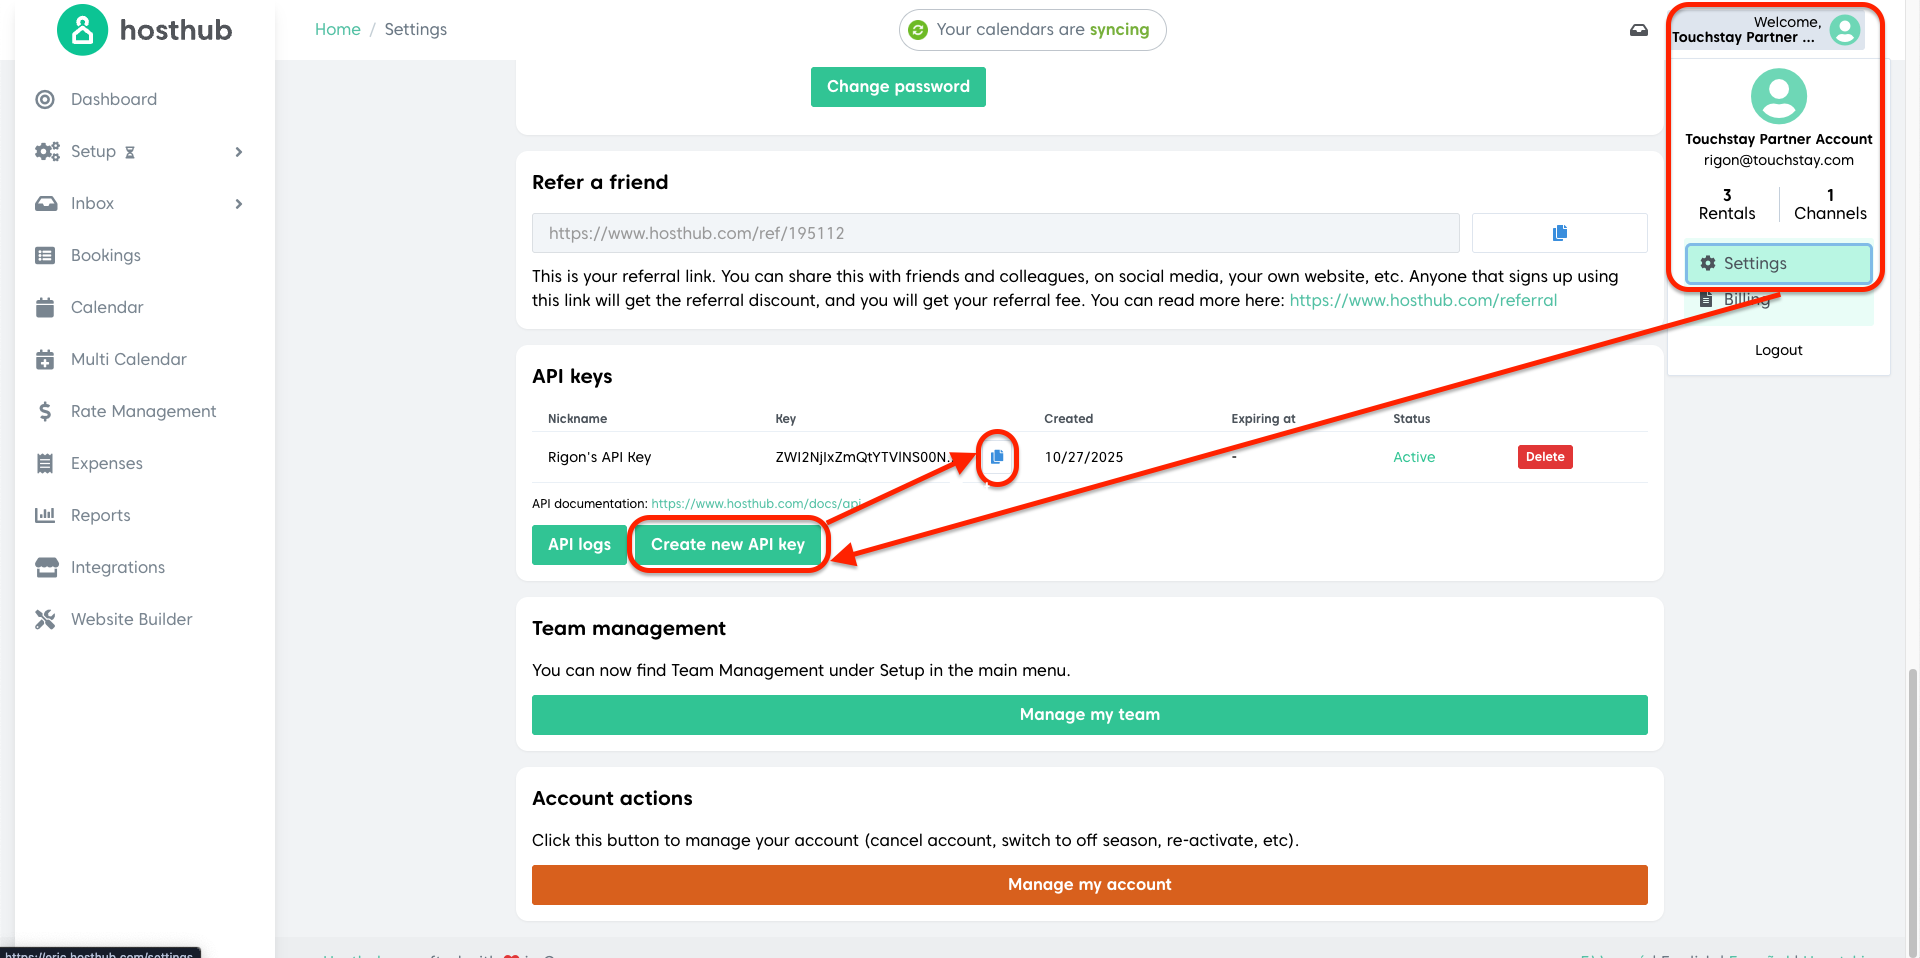
You will need to get your Hosthub API key to get started. Log into your Hosthub account and go to Settings. Follow the steps below to generate your API key:
- Click on Create new API Key
- Give your API key a name (e.g. “Touch Stay”)
- Click the Copy icon.
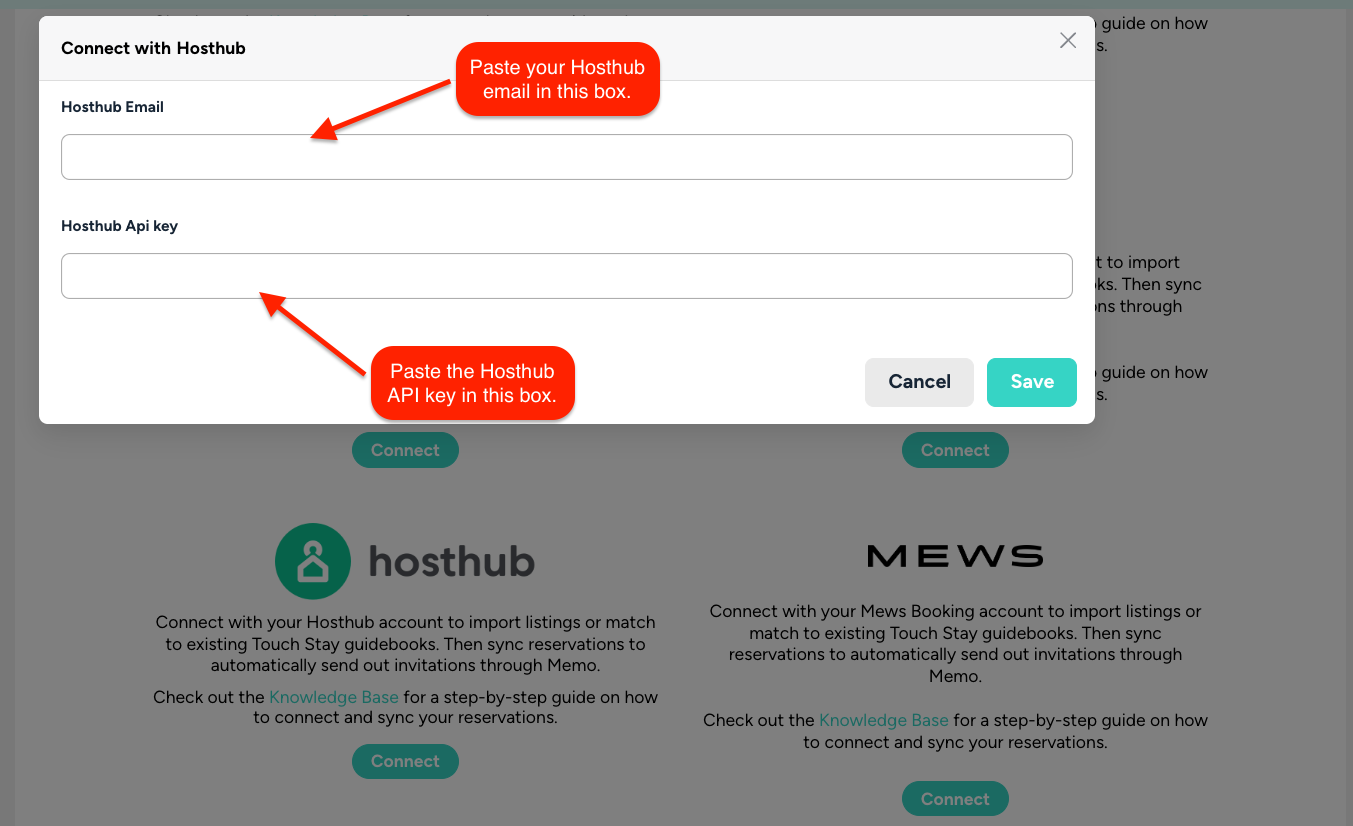
Next, log in to Touch Stay, go to Integrations, and click Connect under the Hosthub logo. Paste your Hosthub Email and API key, and then click 'Save'.
Step 2. Match Rentals
Once authorised, you can match any existing Touch Stay guides to your Hosthub rentals. Go to the Match tab on the Integrations page.
Use the drop-downs to select the correct Hosthub rental for each Touch Stay guide. When complete, click “Match Selected”. If you don’t see any guides on this step, then you can move directly on to Step 3.

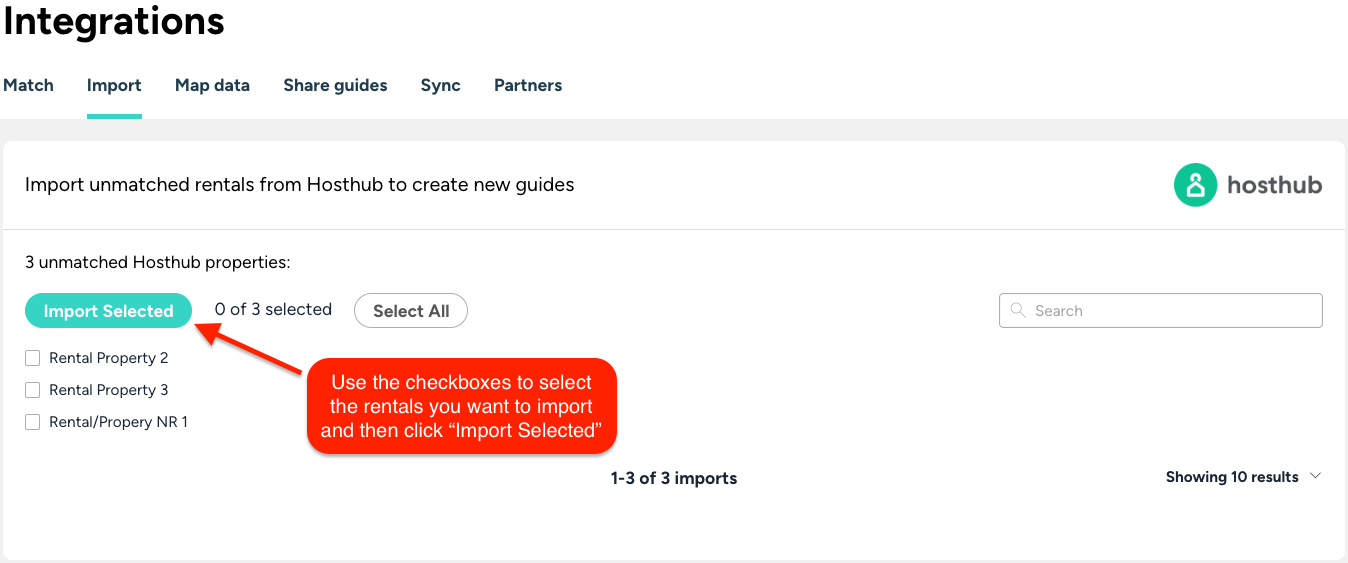
Step 3. Import Rentals
If you have any remaining unmatched rentals from Hosthub, then the next screen allows you to import those into Touch Stay.
Go to the Import tab on the Integrations page. Check the ones you want to import and click the “Import Selected” button.
Touch Stay will import the following:
- Rental Name
- Rental Address
- Cover photo
Each rental imported will create a new Touch Stay guide.
Step 4. Complete guide creation (new Touch Stay customers only)
Matching or importing rentals won’t automatically start syncing rentals from Hosthub, so now is the time to check the content of your guides and make sure they’re ready before you sync rentals with Hosthub.
If you’re new to Touch Stay, then check out the Getting Started page for hints and tips on the quickest way to build out your welcome book content.
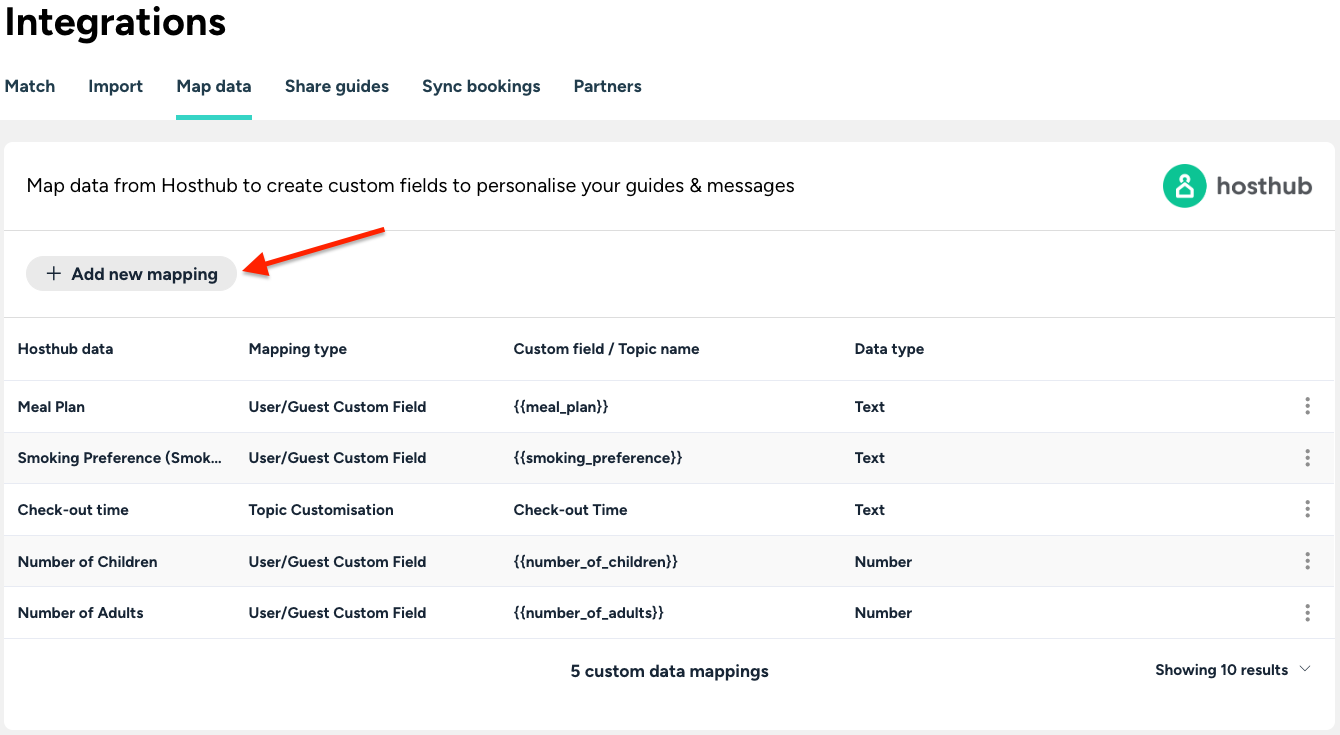
Step 5. Personalisation settings
You can map Hosthub rental & rental data fields to Touch Stay custom fields or topic customisations. These can then be inserted into guides and guest messages to personalise them for each rental. The following paragraphs explain how to map and sync Hosthub booking data to your custom fields or topic customisations.
The following Hosthub booking data fields will be automatically mapped to standard field codes in your Touch Stay account:
- Guest first name
- Guest last name
- Arrival date
- Departure date
- Guest contact phone number*
- Guest contact email address*
*Some OTAs and booking sites do not always provide the guest email address or phone number, so the availability of these two data points is dependent on the platform the guest used to complete their booking.
The following Hosthub booking data fields are also available through the integration. They are optional and can be manually mapped to a Touch Stay custom field:
- Meal Plan (data type: Text)
- Smoking Preference (Smoking/Non-Smooking) (data type: Text)
- Notes (data type: Text)
- Check-in time (data type: Text)
- Check-out time (data type: Text)
- Number of Children (data type: Number)
- Number of Adults (data type: Number)
From here, you can select the Hosthub field to connect, choose a name for your custom field code, and enter any substitute value. Substitute values are used in the case of data missing when the field code is used; see this article for more details about field codes.
Once the custom fields have been mapped, any future bookings that sync from Hosthub will have the relevant data automatically populated for the booking (on the Touch Stay Invitation) and can be used in Memo message templates and guide content.
Step 6. Sync bookings
Once your guides are ready, you can start syncing with Hosthub.
Go to the Sync bookings tab on the Integrations page. Select the guides you want to sync using the checkboxes.
Use the “Select All” option at the top right of the page to select all in one go. Click Sync selected to submit.
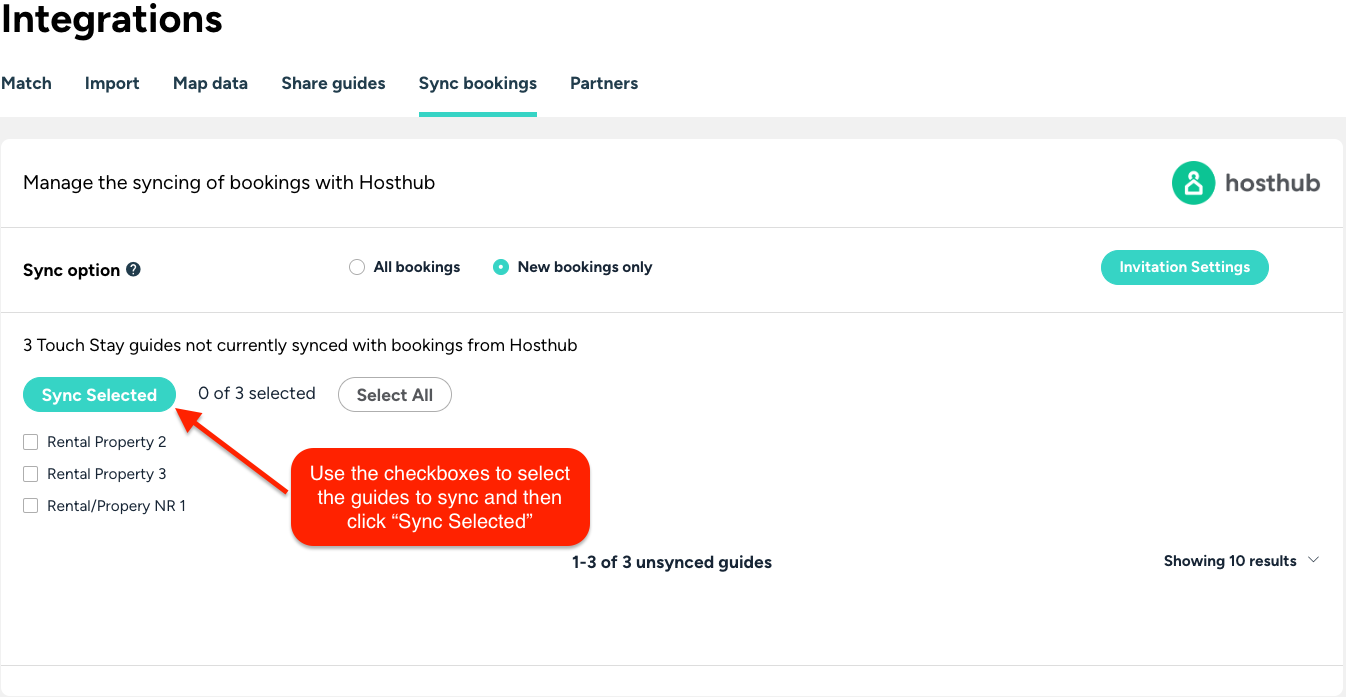
Here, you can choose whether to import all your future bookings or have Touch Stay only import new bookings.
- If you are new to Touch Stay, then choose the “All bookings” option
- If you are already using Memo, Touch Stay's guest messaging tool, before you connect your Hosthub account, then it's best to choose the option “New bookings only” to prevent duplicate bookings being imported.
Next, select the guides to start syncing by using the checkboxes (note the “Select All” option at the bottom left) and click Submit.
If you have selected “All bookings” then all your future-dated bookings from Hosthub will now be imported and will generate invitations and schedule email or SMS messages based on the booking details and your Touch Stay message template schedules. All future bookings for guides with the sync active will also now be imported automatically.
Step 7. Sharing guide links through Hosthub
Touch Stay serves the unique link for each booking to the following:
If you're using the default Touch Stay guide link:
https://guide.touchstay.com/guest/{hosthubBookingID}?source=hosthub
If you're using a custom domain link:
https://<CUSTOM_DOMAIN>/guest/{hosthubBookingID}?source=hosthub
*Note: Replace <CUSTOM_DOMAIN> with your custom domain link.
You can then add this to any Hosthub message templates and automate the sending of the guide link through the Hosthub unified inbox.
To do this, go to Inbox > Scheduling, create a new rule, and add the link to the message content.

And that’s it! Simply use the above to add the link to your Hosthub message templates as part of your communication flow with your guests.
Notes:
A note about Hosthub message timing
There will be a slight delay between the booking arriving in Hosthub and the link being sent back from Touch Stay whilst our respective systems process the booking, generate the link, and pass it back. Therefore, we recommend NOT setting your message to send "Immediately after booking is created".
Instead, we recommend adding a message ~1 hour later or perhaps the next day, that's dedicated to introducing guests to everything they'll find in your guidebook.
What happens if I’m already using Memo?
If you’re already using Memo but want to now change to using Hosthub to send the links, then you would need to archive the relevant Memo message templates. This prevents them from being added to any future bookings that come in, and you can then activate a new message flow in Hosthub. Note that archiving message templates won’t affect any existing invitations. If you want to cancel any Memo messages that are already scheduled, then you will need to delete the Memo template instead.