How to create message templates using Message Hub
In this article:
- What is Message Hub?
- How does it work?
- How do I create message templates?
- Enhance Your Messages with Field Codes and Deep Links
- How do I create invitations?
What is Message Hub?
Message Hub is Touch Stay’s guest messaging system. Schedule unlimited, customised emails and/or SMS text messages to guests with a link to the relevant Touch Stay guide.
How does it work?
There are three simple stages:
- Select and customise the message templates you want to use
- Schedule the messages to send out to each of your chosen recipients. You can set and adjust the schedule for each individual message
- Create an invitation for each person whom you want to send messages to
How do I create message templates?
💡 Tip: Look out for the small help icons (❓) next to each field, hover over them for quick explanations if anything’s unclear.
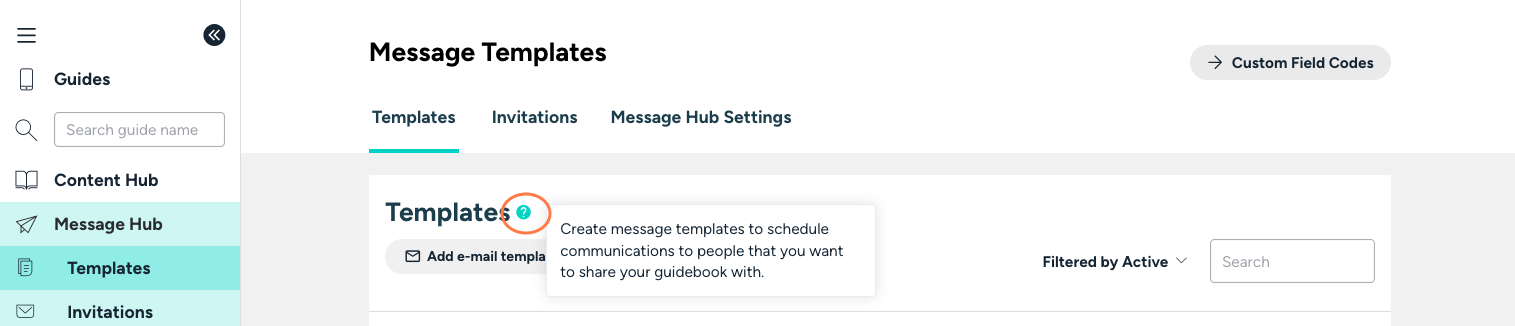
1. Select your templates
- Head over to the Message Hub page
- Start adding message templates by using the “Add Email Template” or "Add SMS Template” buttons.

In the “Add Email Template” or “Add SMS Template” dropdowns, you’ll see a list of suggested templates.
Each one comes with pre-filled content that you can customise to suit your needs.
You can either:
- Select one of the suggested templates, or
- Choose “Custom Message” at the bottom of the list to start from scratch.
Once you make your selection, a form will appear for you to complete.
We’ll walk you through each section of this form step by step:
ℹ️ Note
If you used Touch Stay messaging before the launch of Message Hub on May 11th, 2022, any existing message templates that you were using have been copied over into Message Hub.
You can now:
- Continue using these templates as before
- Edit them
- Or archive them and start fresh
If you have multiple guides in your account, Message Hub’s new template system will help you simplify and consolidate your templates.
See this article for more guidance on how to do that.
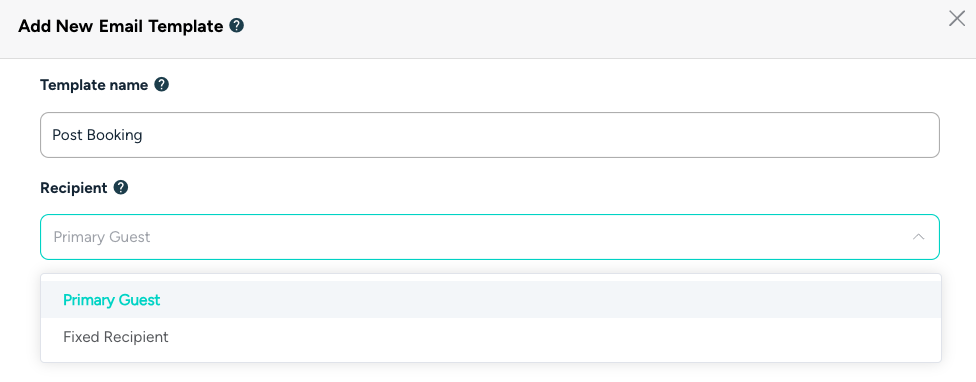
2. Select the message recipient
The Recipient is the person who will receive this message. In most cases, you’ll want the recipient to be the Primary Guest.
The message will then be sent to the contact details that you’ll later add to the invitation.
However, you can also choose to set a Fixed Recipient. This option allows you to send the message to:
- Yourself
- A member of your team
- Or any third party providing services to your guests
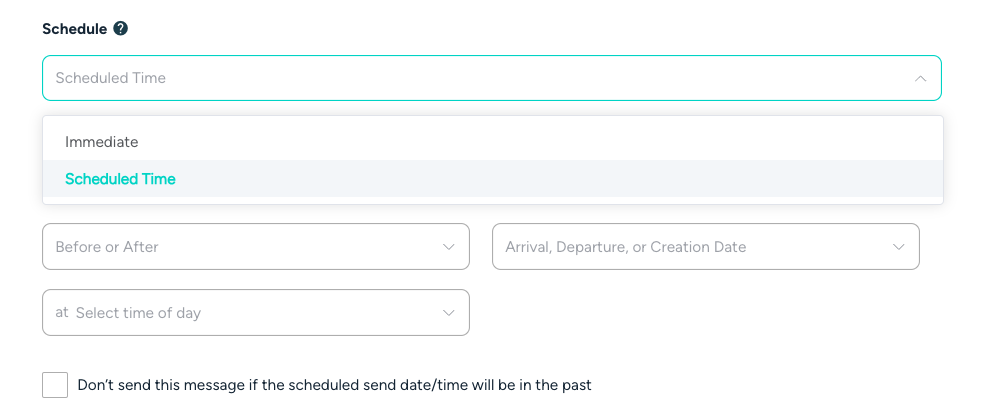
3. Choose your message schedule
The Schedule determines when a message will be sent to the recipient.
- Immediate means the message will be sent as soon as the invitation has been created.
- Scheduled Time allows you to send the message at a specific time period related to the arrival, departure, or creation date of the invitation (for example, 2 days before the arrival date).
You can also choose the time of day that the message will be sent.
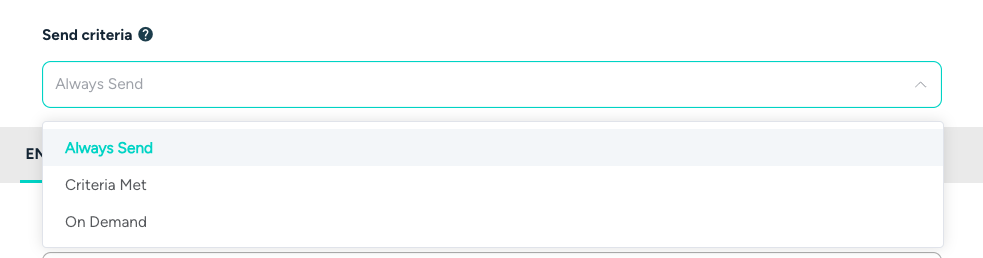
4. Adjust the sending criteria
The Send Criteria determines which recipients will receive your message.
This feature allows you to create different messages for different guides, events, or people.
It’s considered an advanced feature of Message Hub.
In most cases, you’ll simply want to select “Always Send”, which means this message will be used for all your invitations.
⚙️ Advanced Options
If you think different send criteria might be useful for your setup, you can find a more detailed explanation of all the available options in this article.
Templates set to “On Demand” won’t be added to invitations automatically.
Instead, they can be manually added whenever you need them to any invitation
Use this option if you want to save a message template for occasional use only.
-
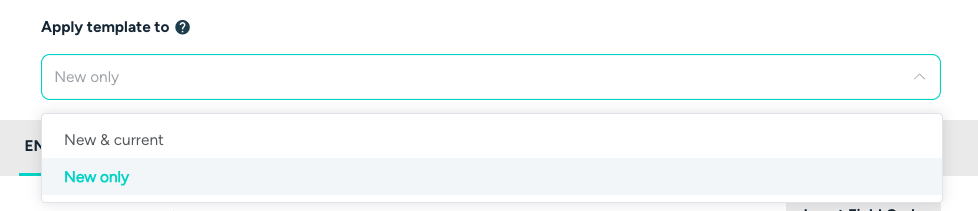
Apply template to
Set which invitations this template will be applied to.
- New only – applies the template only to invitations created after the template was created.
- New & current – applies the template to all invitations with a future departure date.
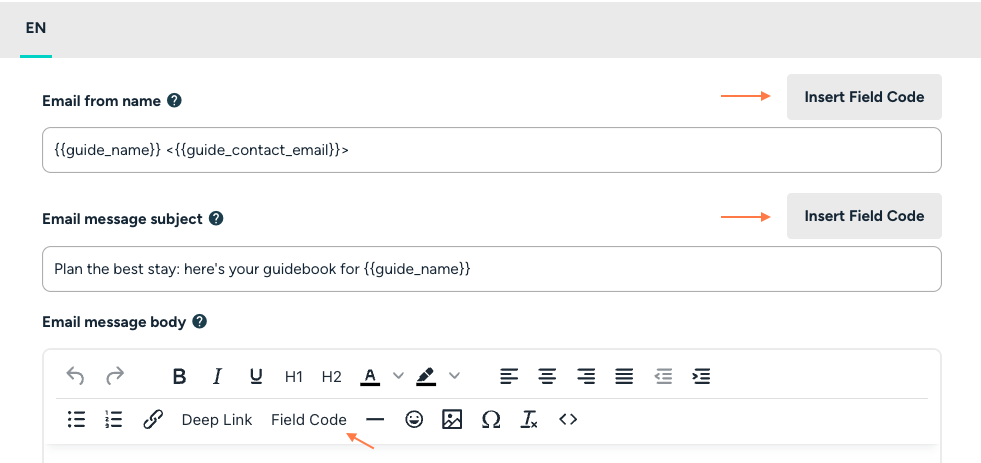
5. Customise your message content
The final element of the template is the message content.
For email templates, this includes:
- The “Email From” name
- The Email Subject
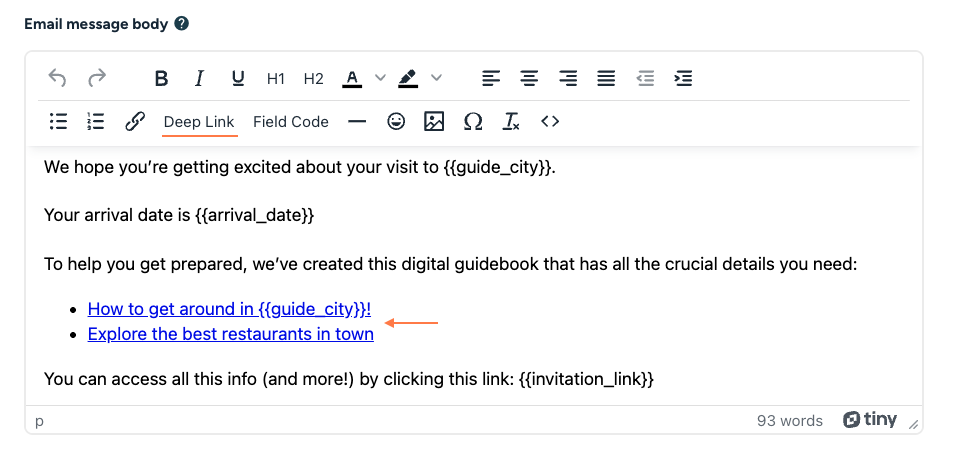
- The Email Body
You can adjust the “Email From” name and “Reply To” email if you’d like guest replies to go to a different email address than the one linked to your guide.
For SMS templates, you only need to edit the message content.
💡Tip:
SMS messages are limited to 320 characters per message.
Keep them short and clear so they’re easy for guests to read at a glance and send as a single text.
You can also use field codes to automatically pull in guide content — this helps you include personalised details without exceeding the character limit.
Enhance Your Messages with Field Codes and Deep Links
-
Field codes
Each message can include field codes to automatically personalise the content based on the guest or guide details.
Field codes let you create templates where certain details, like the link to your guide, guest name, or stay dates, update automatically. That means you don’t need to change these details every time you send a message.
In practice, field codes look like this:
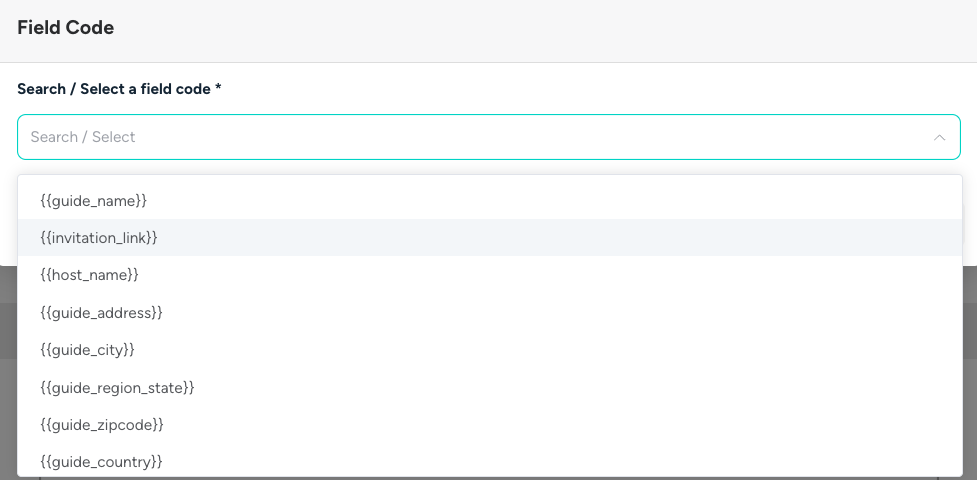
It’s simply a short code surrounded by double curly brackets.
You insert it into your message, and then, when the message is sent, the code is replaced by the relevant data.
For example, if you add {{guest_first_name}} to your message, it will be replaced by the actual first name of the guest as set on the invitation.
To add field codes to your messages, use the “Insert Field Code” button next to the relevant text entry box, or choose the “Field Code” option from the toolbar in your message body.
A more detailed explanation of field codes and their uses can be found in this article.
💡 Tip:
Don’t forget to include the field code {{invitation_link}} (or a deep link, see below) if you want the message to include a link to your guide.
All of our pre-filled templates, as well as those copied over from the legacy messaging system, already include this field code by default.
If you’re editing these templates or creating your own for guests, make sure you’ve added the {{invitation_link}} field code, or a deep link to a specific section of your guide.
-
Deep links
Deep links can be added to your Message Hub templates to direct people straight to specific Categories, Subcategories, or Topics within your guide.
You can find the “Deep Link” option in the toolbar of the message body.
⚠️ Important:
Do not use the links from the Direct Links option found in Content Hub; those links are for your Quick Share Link and should not be used for invitations.
Learn more about Deep Link to message template here
How do I create invitations?
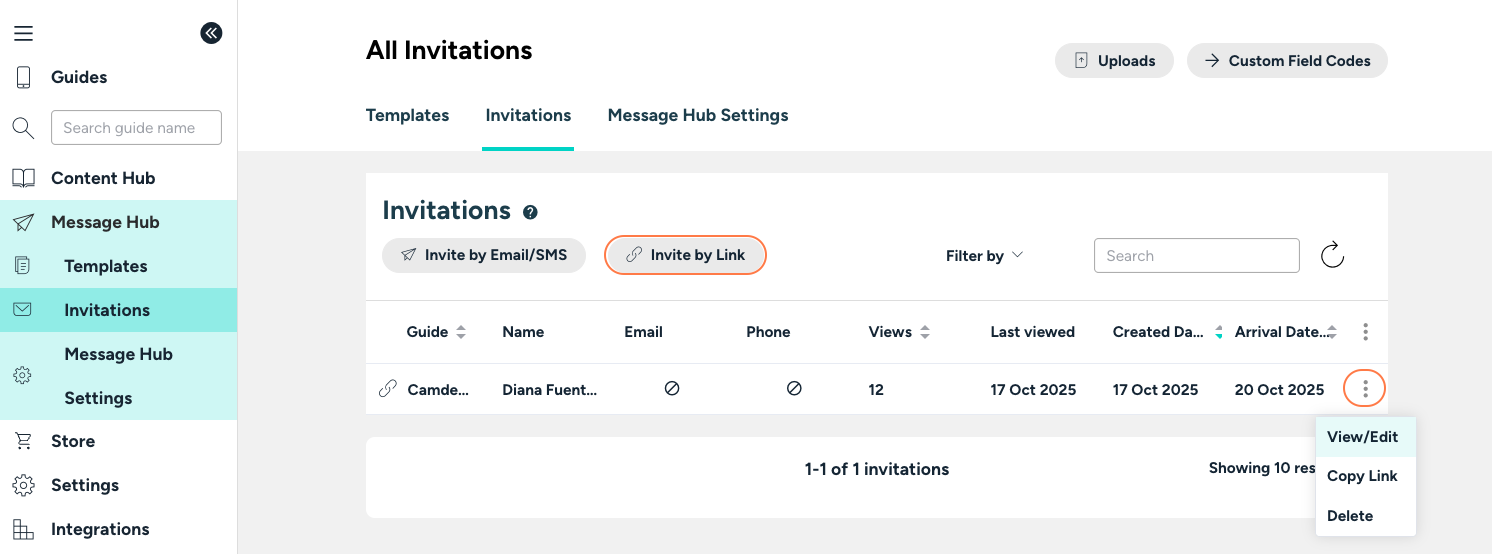
Invitations can be created from either the Invitations tab on the Message Hub page, or from the Invite & Share tab on each Guide page.
Use the “Invite by Email/SMS” button and then complete the form with:
- the details of the person you want to invite
- their access dates and lead time
- any custom fields
You will then be presented with the message schedule for this person based on the message templates which have matching criteria.
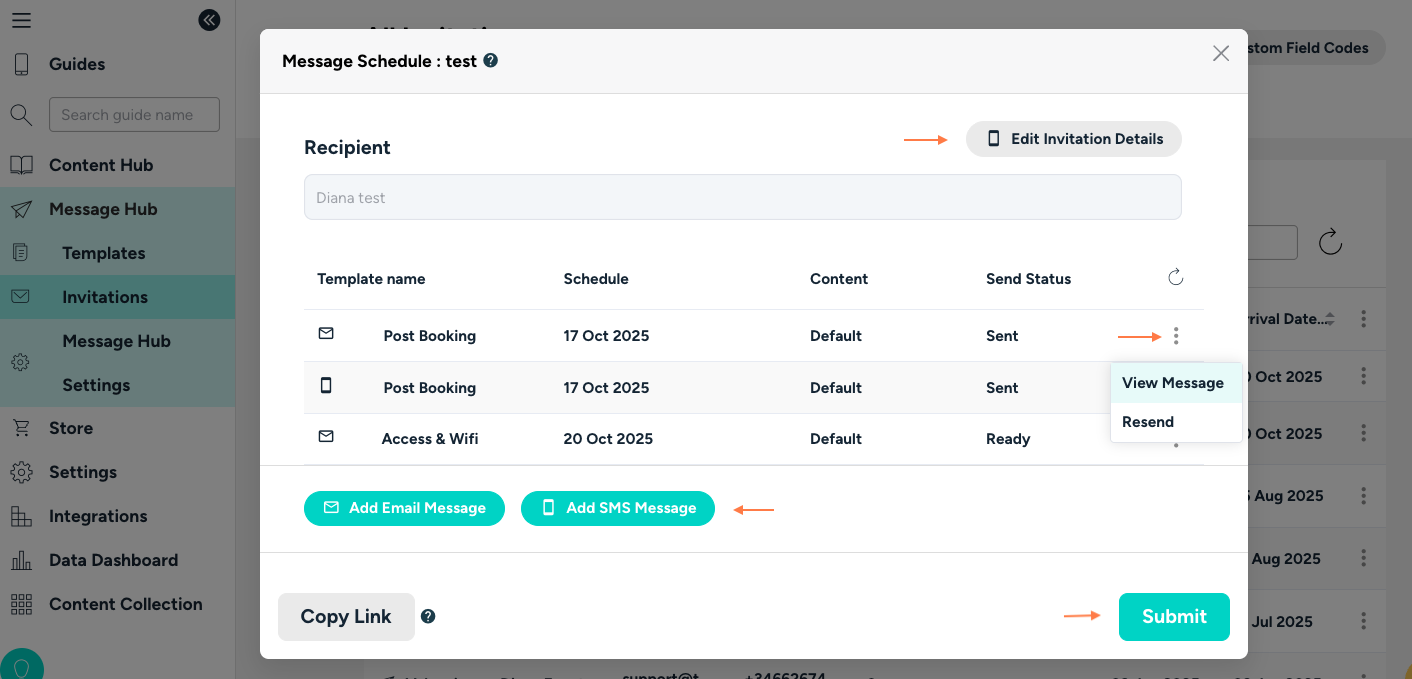
Click the three dots next to an invitation to:
- View or edit the invitation details
- Copy the link for that specific invitation if you need to share it manually
- Delete the invitation once deleted, the link will stop working for that visitor
Edit Invitation by Link
On this screen, you can edit or remove messages using the options in the three dots menu for each message.
You can also edit the invitation details using the button at the top right, or add new messages for this person using the options at the bottom of the page.
Sending Your Invitation
Once you’re happy that the invitation details and messages are correct, click Submit.
Message Hub will then schedule all the messages and send them automatically on your chosen day and time.
You can check the status of each message at any time by opening the message schedule screen again, just click the three dots menu for the invitation and choose “View/Edit.”